
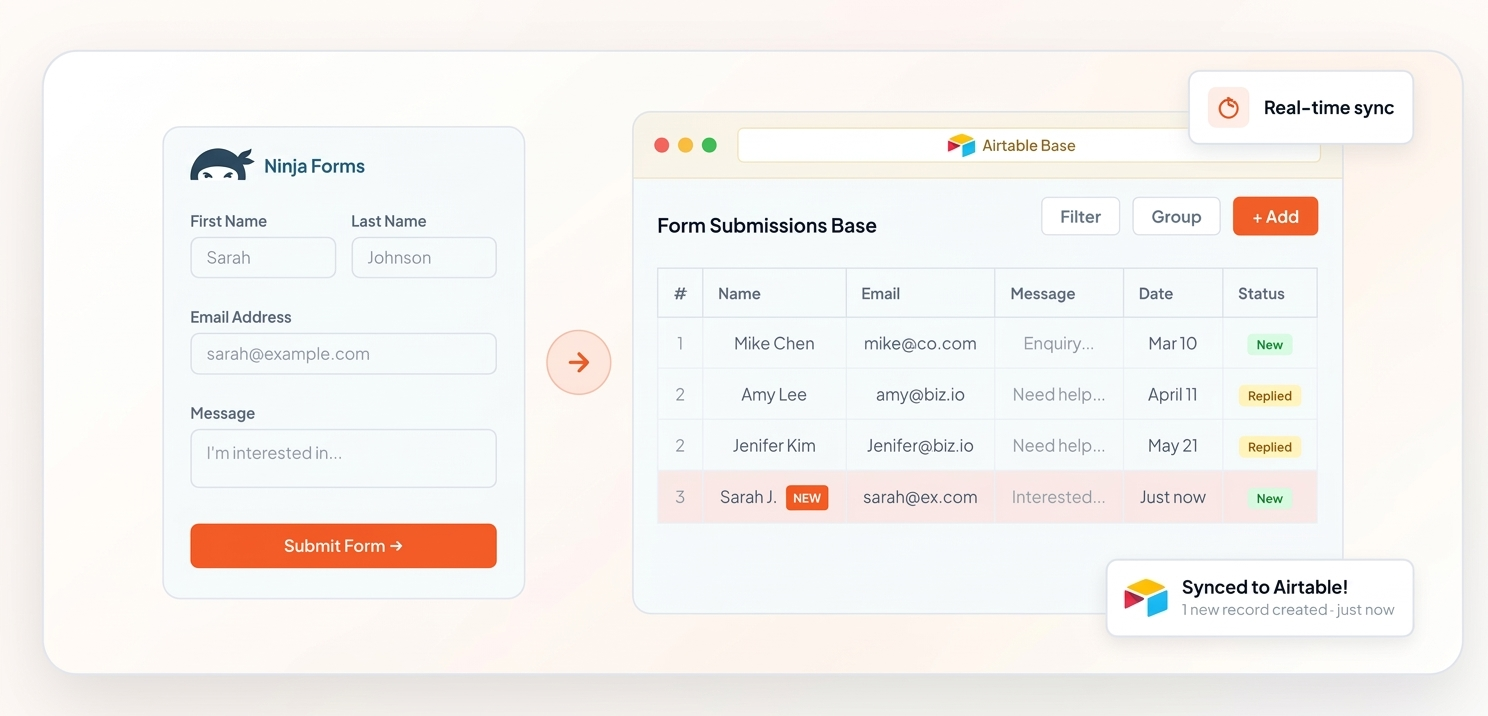
If you use Ninja Forms on your WordPress site and Airtable to manage your data, this is the complete guide to connecting the two. You'll learn how to send every Ninja Forms submission directly to Airtable — automatically, in real time — without Zapier, without Make, without webhooks, and without writing a single line of code.
Whether you're searching for ninja forms airtable integration, how to connect ninja forms to airtable, send ninja forms data to airtable, or ninja forms airtable automation — this guide covers every scenario.
What You Need
Gathering these essentials before you start keeps the setup fast and headache-free.
- WordPress with Ninja Forms installed (the free version works)
- An Airtable account (free tier is fine)
- The Integration for Airtable plugin (free on WordPress.org)
- An Airtable Personal Access Token (created in ~2 minutes)
- An Airtable base with a table ready to receive form data
The plugin communicates directly with the Airtable REST API — no Zapier, Make, Pabbly, or any other middleware required. Your data goes straight from your WordPress server to Airtable.
How to Connect Ninja Forms to Airtable — Step-by-Step
Follow these six steps to set up your Ninja Forms to Airtable integration. The whole process takes about 10 minutes.
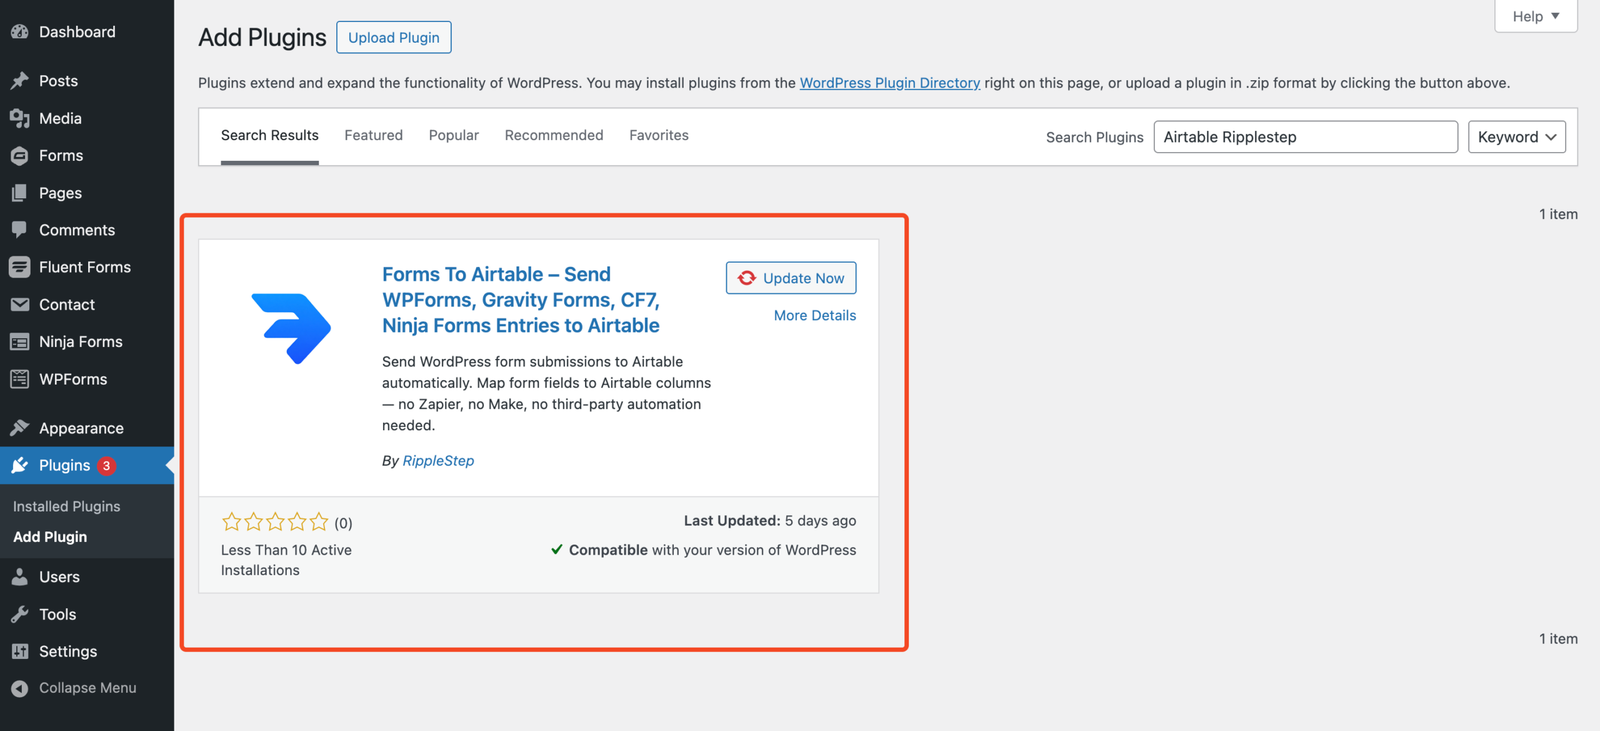
In your WordPress dashboard, go to Plugins → Add New. Search for "Airtable RippleStep". Click Install Now, then Activate. A new Forms to Airtable menu item will appear in your WordPress sidebar.
2.1 Open the Personal access tokens screen
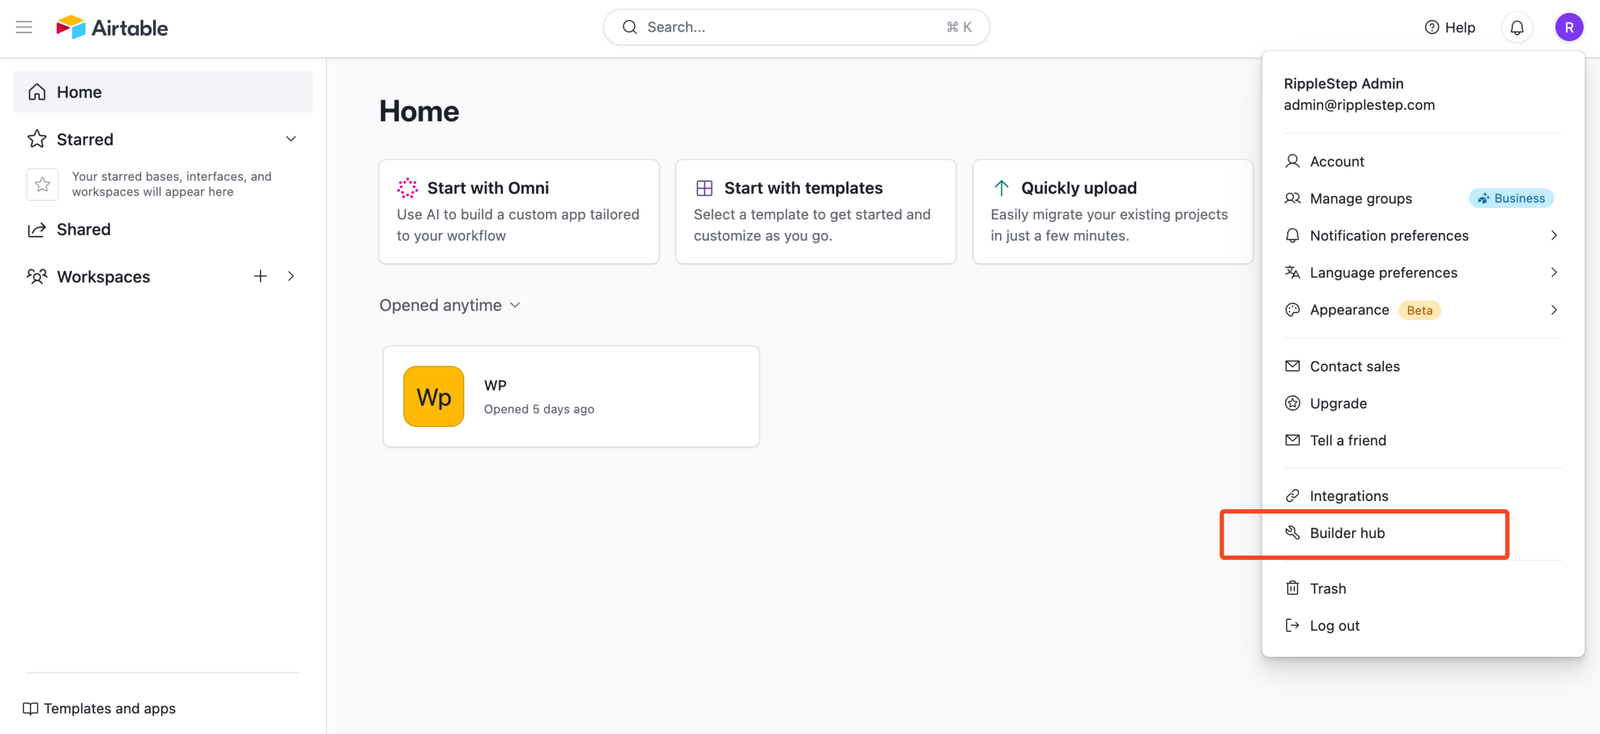
Log into Airtable, click your avatar in the top-right corner and choose Account. In the left sidebar, open Builders hub → Personal access tokens or go directly to airtable.com/create/tokens.
2.2 Click "Create token" and name it
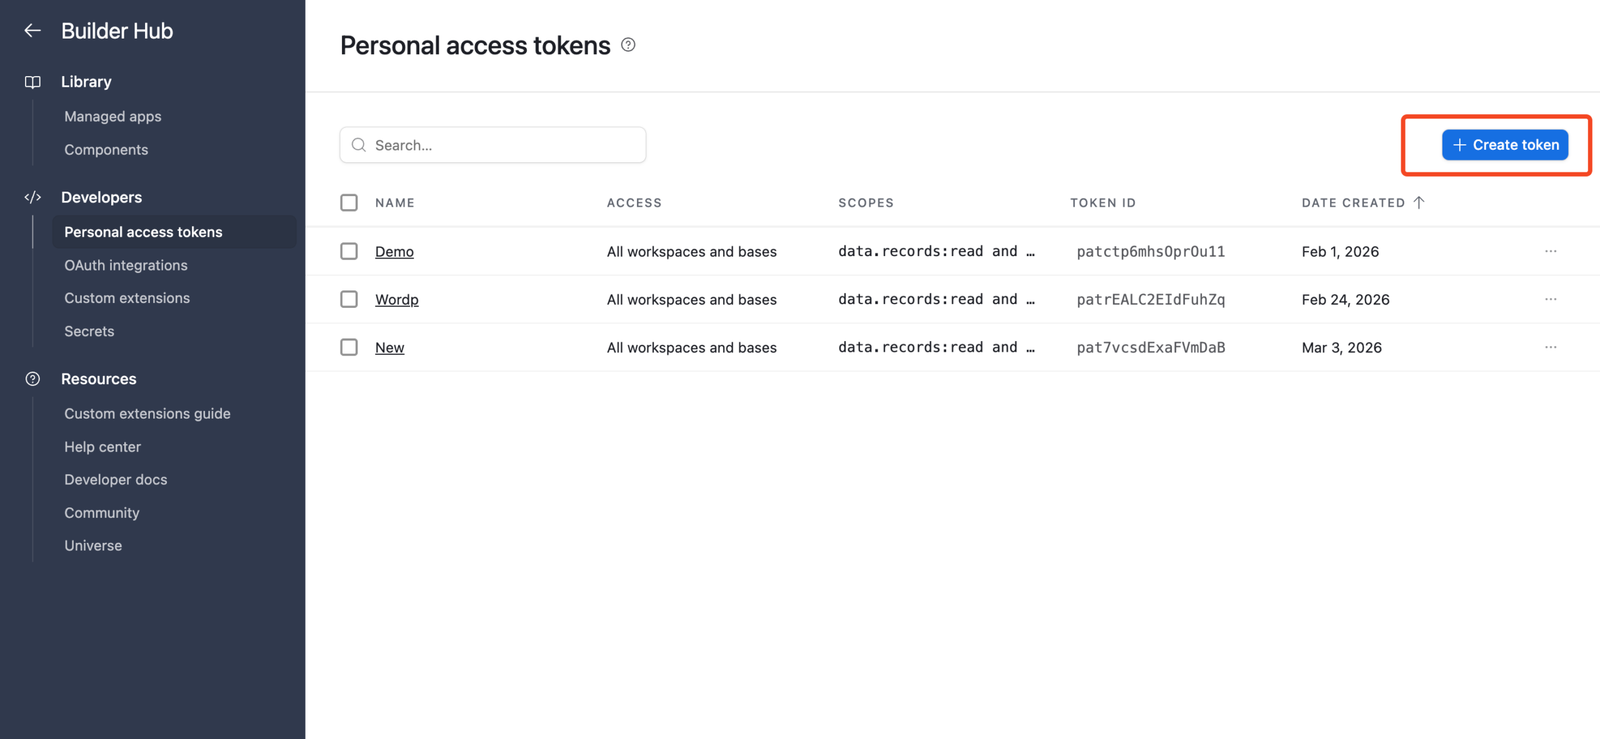
Click + Create new token. Give it a recognizable name like "WordPress Ninja Forms" so you can identify it later.
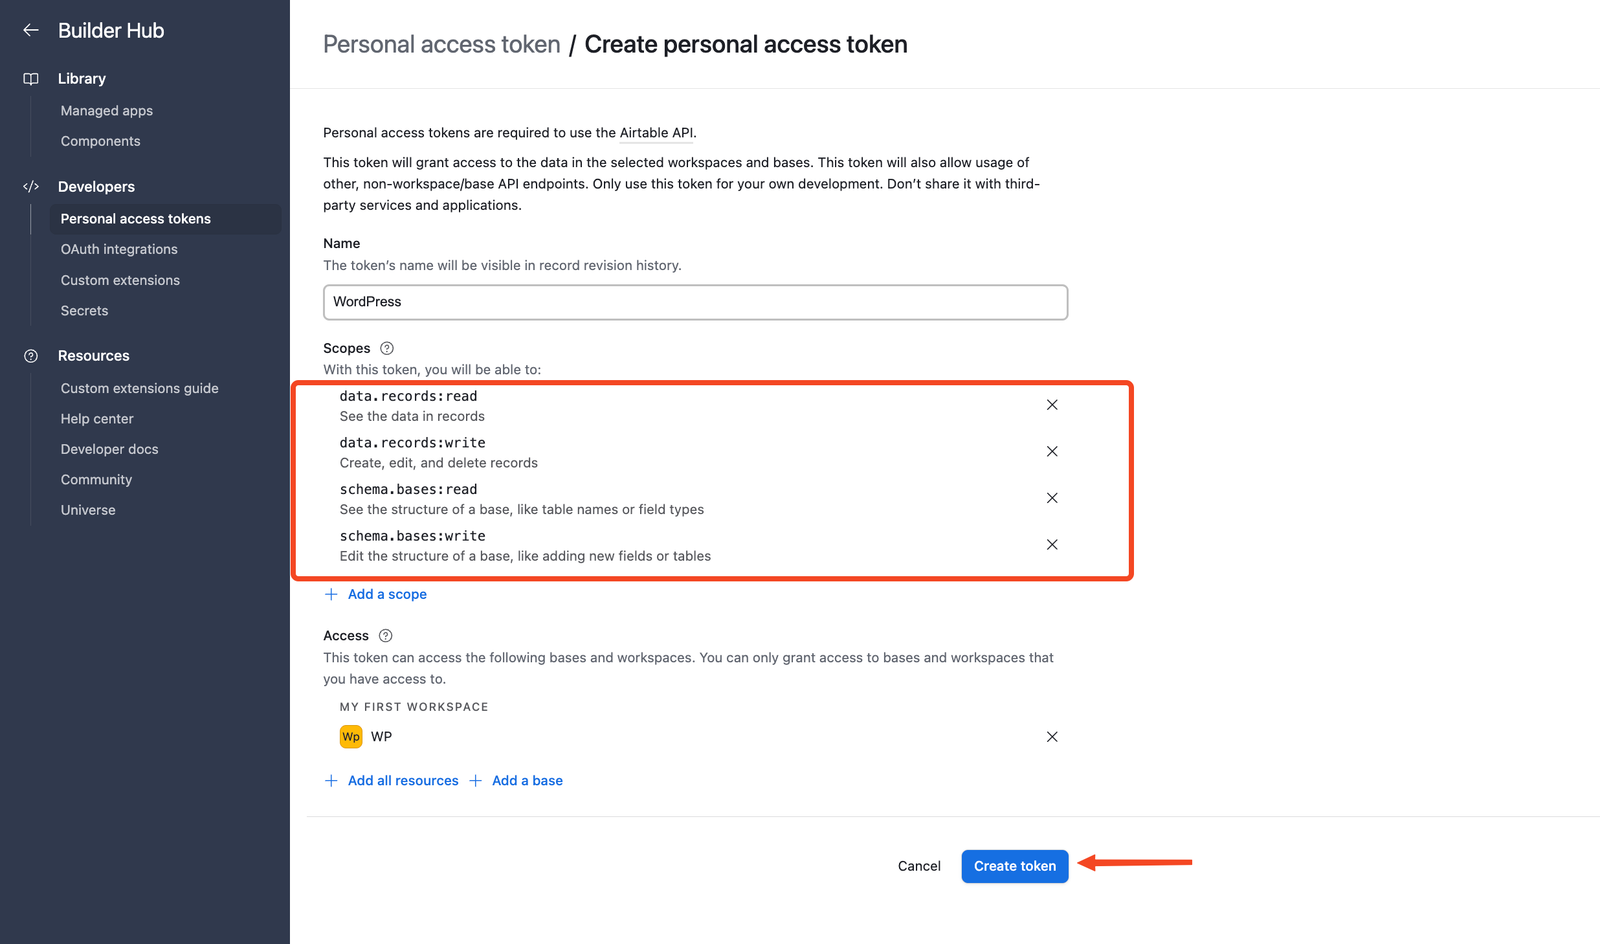
2.3 Set scopes and bases, then save
schema.bases:read– lets the plugin read your base and table structure.schema.bases:write– lets it create and modify tables and columns.data.records:read– lets it read existing records.data.records:write– lets it create new records from Ninja Forms submissions.
Select all four scopes. Under Access, choose the Airtable base(s) where form submissions will land. Click Create token and copy it — you'll paste it into WordPress in the next step.
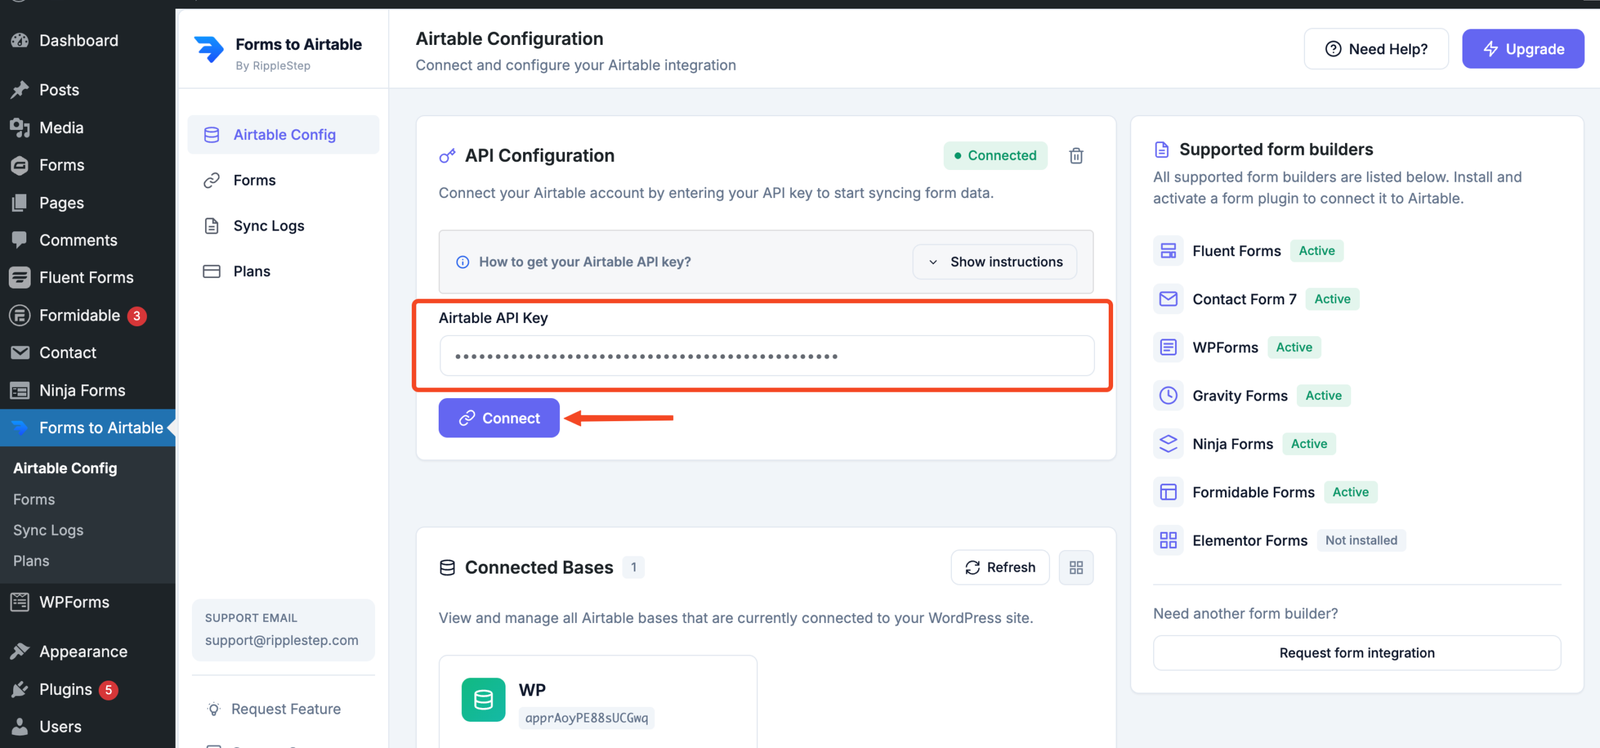
In WordPress, click Forms to Airtable in the sidebar, then open the Airtable Config tab. Paste your token into the field and click Save & Verify. The plugin confirms the connection and loads your Airtable bases.
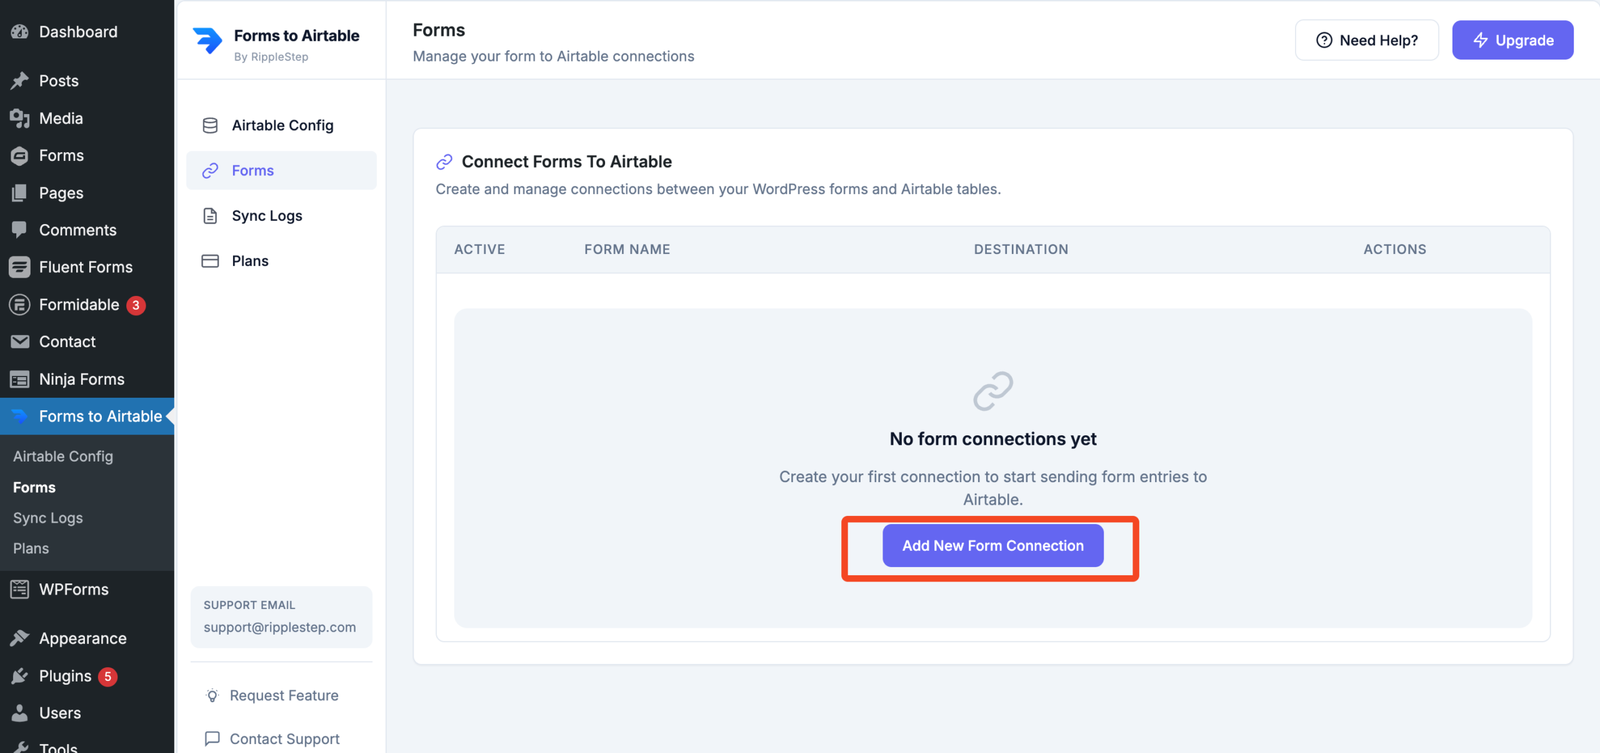
4.1 Open the Forms → Connections screen
In your WordPress dashboard, go to Forms to Airtable → Forms. Click Create new form connection.
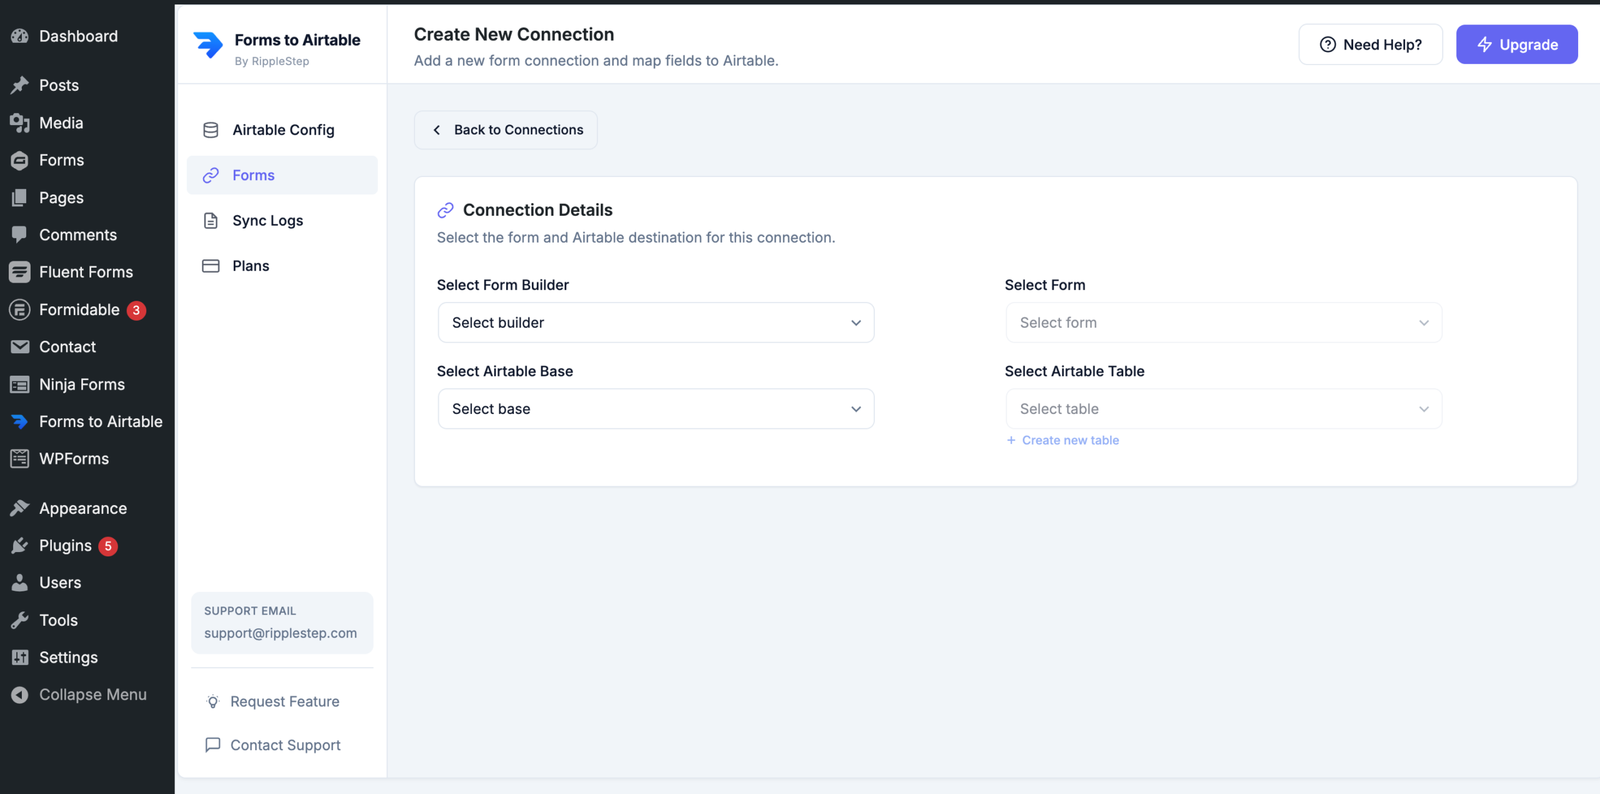
4.2 Select form builder, form, base and table
In the connection wizard, set Form builder to Ninja Forms, pick your specific Ninja Forms form, then select the Airtable base and table. You can also create a new Airtable table directly from the plugin — it will auto-generate columns based on your form fields.
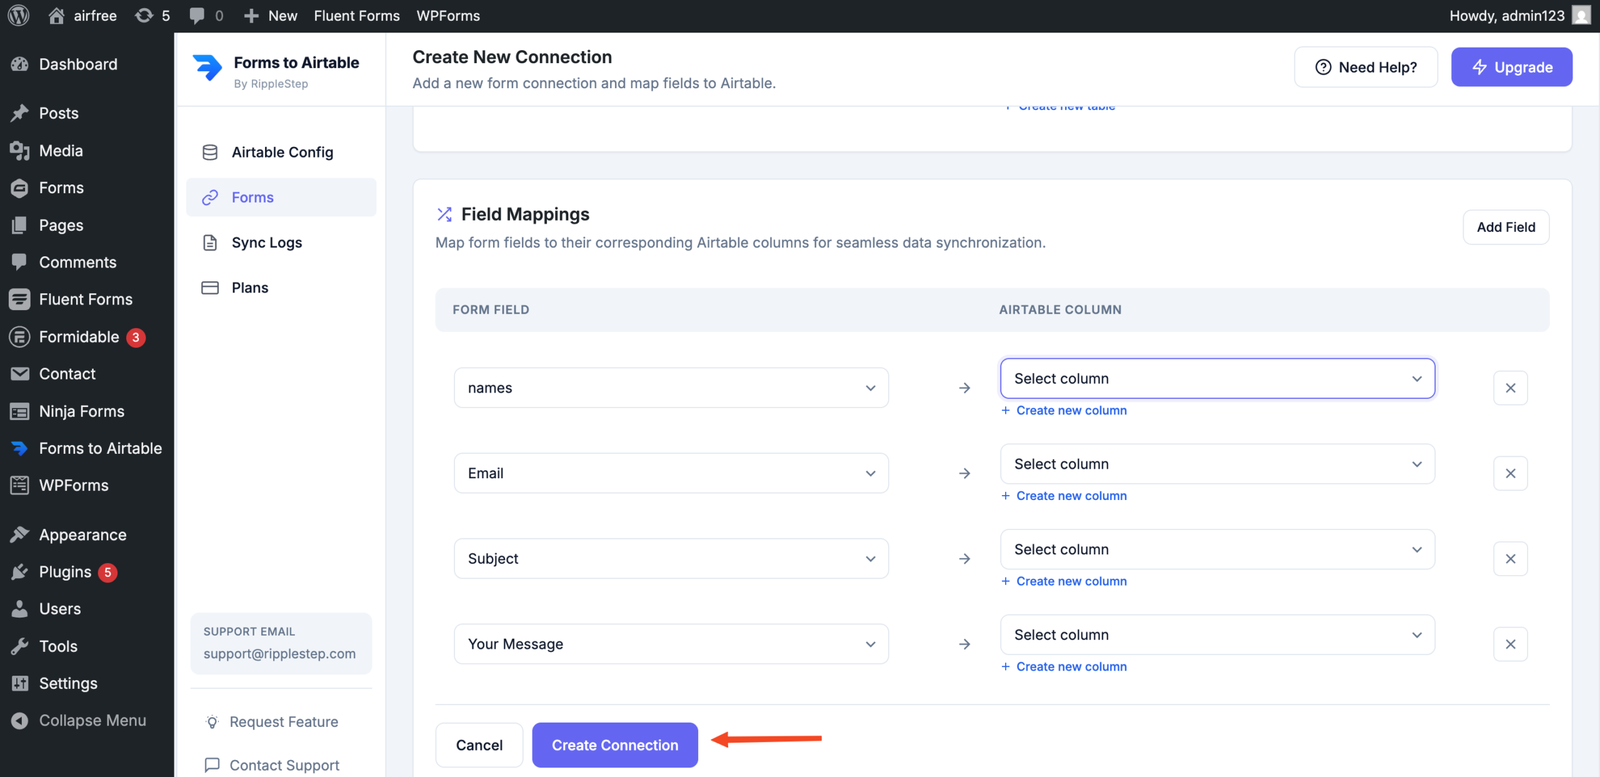
Use the dropdown menus to match each Ninja Forms field to the corresponding Airtable column. The field type reference table below shows which Airtable column type to pair with each Ninja Forms input type. Click Save Connection when you're done.
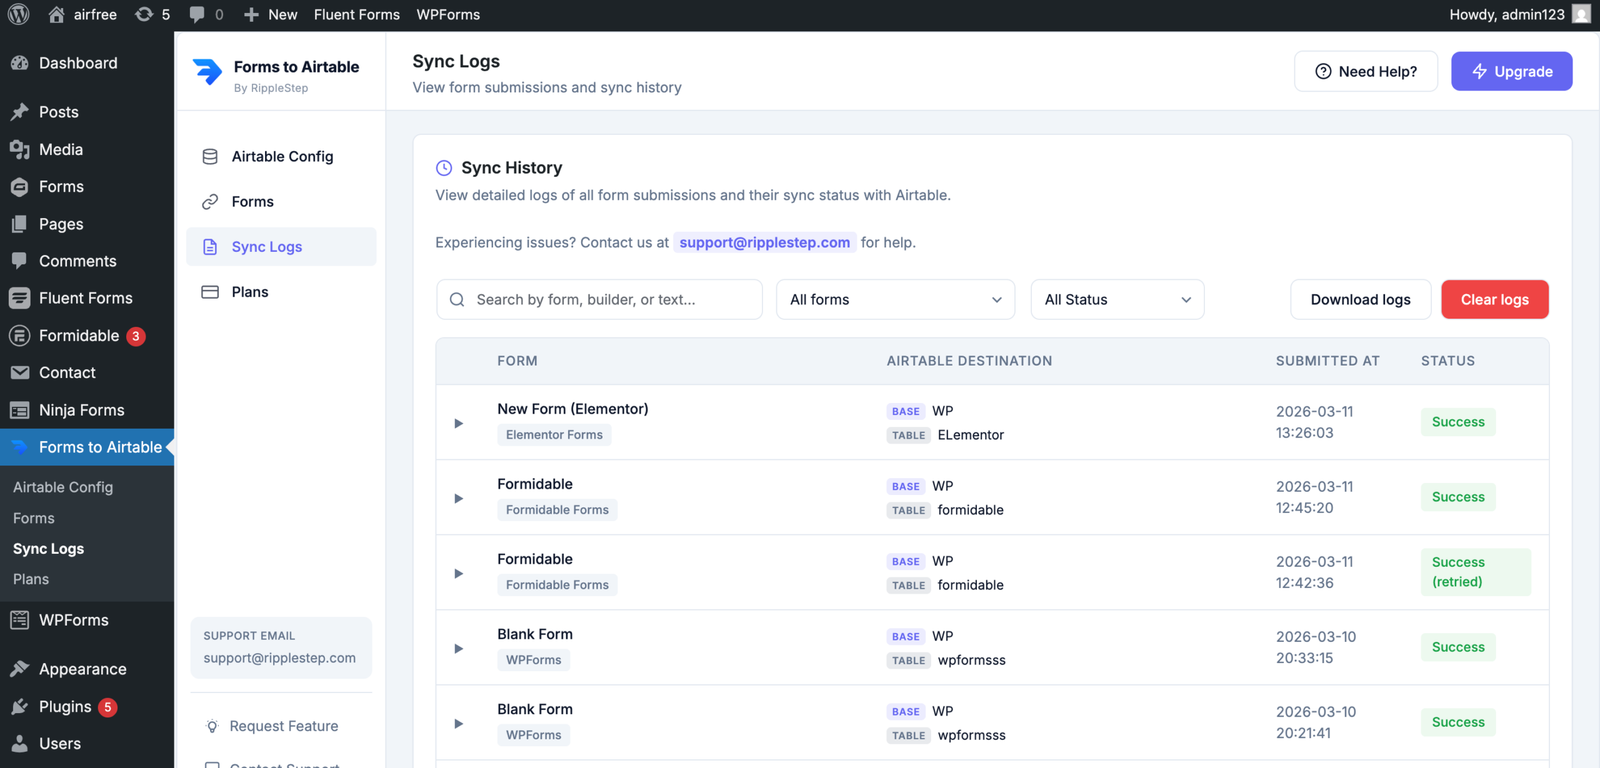
Submit your Ninja Forms form with test data. Go to Integration for Airtable → Logs in WordPress — you should see a success entry within seconds. Then open your Airtable table and confirm the new record is there.
If you hit any hurdle during installation, token setup, or field mapping — our team is happy to help you through it.
Email support@ripplestep.com with a short description of the issue (and screenshots if possible), and we'll walk you through the fix.
Ninja Forms Airtable Integration: Plugin vs. Zapier vs. Make
Many people searching for ninja forms airtable zapier or ninja forms airtable make end up using the direct plugin approach once they see the comparison. Here's how the options stack up:
| Feature | Integration for Airtable Plugin | Zapier | Make (formerly Integromat) |
|---|---|---|---|
| Monthly cost | Free / $99/yr (Pro) | $20–$49+/mo | $9–$16+/mo |
| Setup complexity | Low — done in WordPress | Medium — external account | Medium — external account |
| Real-time sync | ✓ Yes | Delayed (polling on free) | ✓ Yes (paid) |
| Field mapping UI | ✓ Built-in | ✓ Built-in | ✓ Built-in |
| Sync logs | ✓ In WordPress | ✓ In Zapier dashboard | ✓ In Make dashboard |
| Retry on failure | ✓ Auto (Pro) | ✓ Manual replay | ✓ Replay |
| Data stays on your server | ✓ Yes | ✗ Routes via Zapier | ✗ Routes via Make |
| No third-party account needed | ✓ Yes | ✗ Required | ✗ Required |
What the Ninja Forms Airtable Integration Does
From form submit to Airtable row – automatically
- Each Ninja Forms submission becomes a new record in your chosen Airtable table within seconds.
- Field mapping ensures every form field lands in the right Airtable column.
- No CSV exports, no copy‑paste, and no third‑party automation tools in the middle.
Lead capture
Every contact form submission lands straight in your Airtable CRM base.
Applications & registrations
Event sign-ups, job applications, and onboarding forms sync to Airtable for review.
Order & request forms
Quote requests and service forms go directly to your Airtable operations table.
Surveys & feedback
Survey responses appear in Airtable where your team can filter, sort, and act.
File submissions
File uploads from Ninja Forms sync to Airtable Attachment columns (Pro).
Multi-step forms
Multi-step and conditional Ninja Forms submit one consolidated record to Airtable.
Free vs Pro Plans
Start with the free plan, then upgrade when you need more volume or advanced features.
Starter
Perfect for testing your first Ninja Forms → Airtable workflow.
- 1 active form connection
- Up to 300 syncs / month
- Core field mapping
- Sync logs
Troubleshooting Ninja Forms Airtable Sync Issues
Open Forms to Airtable → Logs and read the error message. Most common causes: the wrong Airtable base is selected in the connection, or the token is missing the data.records:write scope. Edit the token in Airtable and re-verify in the plugin settings.
The form must be saved before the plugin can read its fields. Go to Ninja Forms, open your form, click Done to save it, then re-open the connection in the plugin and refresh the field mapping screen.
A submitted value doesn't match the Airtable column type. For example, sending text to a Number column. Check the field type reference table above and update your column types in Airtable to match what Ninja Forms sends.
Check that the form connection is set to Active in the plugin. Also confirm your Ninja Forms form is published and accessible on the frontend — the plugin only fires on real submissions, not backend test entries.
The Personal Access Token may not have access to the correct base. In Airtable, edit the token under Builders hub and make sure your target base is listed under Access. Then re-verify the token in the plugin.
FAQ — Ninja Forms Airtable Integration
Yes, for most use cases. The plugin talks directly to the Airtable API using your Personal Access Token, so you don't need Zapier, Make, or any other automation tool just to move Ninja Forms entries into Airtable.
No. The plugin hooks into Ninja Forms' native submission events inside WordPress — no external webhook URL, no Zapier webhook step, no custom API endpoint required. Everything runs inside your WordPress install.
Yes. The free plan includes 1 active connection and up to 300 syncs per month — enough for low-volume forms. The Pro plan ($99/year) unlocks unlimited connections and unlimited syncs.
File attachment sync is available on the Pro plan. Uploaded files from a Ninja Forms file upload field are sent to an Airtable Attachment column automatically with each submission.
Yes. Edit the connection, select a different table, and update the field mapping. Existing records in the original table are not affected.
Yes. Multi-step Ninja Forms submit all collected fields at once when the final step is completed. The plugin receives the full submission and sends all mapped fields to Airtable as a single record.
Absolutely. The entire setup — installing the plugin, connecting to Airtable, creating the form connection, and mapping fields — is done through visual interfaces in WordPress and Airtable. No code, no API calls, no webhooks to configure manually.
Yes. The integration works with the Ninja Forms core (free) and all Pro add-ons. Any field that Ninja Forms exposes in a submission — from any add-on — can be mapped to Airtable.
Ninja Forms Airtable Automation Ideas
Once your Ninja Forms submissions are flowing into Airtable automatically, you can build powerful automations entirely within Airtable — no additional tools needed:
- Airtable Automations → Send email notification when a new lead record arrives from your contact form.
- Airtable Automations → Create a task in Asana or Jira for every new support request submitted.
- Airtable Automations → Send a Slack message to your team channel when a high-value quote request comes in.
- Airtable Interface Designer to build a client portal that reads from the same base your Ninja Forms feed into.
- Airtable Automations → Update record status and trigger a follow-up email when the Status field changes.
Because your Ninja Forms data lands in a real Airtable table, every Airtable feature — views, automations, interfaces, API access, and third-party integrations — works with your form data out of the box.
Ready to sync your first Ninja Form?
Install the free Forms to Airtable plugin, connect your base, and start sending submissions to Airtable in under 10 minutes.
Install Forms to Airtable Free →